How to Save Excel Workbook on a Cell or Range Change using Excel VBA(download workbook)
Table of Contents
When its important to save workbook on Cell Changes?
If you are dealing with very sensitive data where information is really important and workbook you are using for this purpose is well protected, then you can try Excel VBA code (below) to save the workbook as and when a cell or range of cells changes
This macro allows you to define the range of cells that, when changed, forces the workbook to save, this ensures that data entered in this defined cell or range is saved.
Copy by double clicking the code area and paste in to your VBE Module
Private Sub Worksheet_Change(ByVal Target As Range)

'Step 1: Does the changed range intersect the specified range?
If Intersect(Target, Range("A2:D8")) Is Nothing Then

'Step 2: If there is no intersection, exit procedure
Exit Sub

'Step 3: If there is an intersection, save the workbook
Else
ActiveWorkbook.Save

'Closeout the If statement
End If

End Sub
How does the code work?
- The secret to this code is the Intersect method.
- Because we don’t want to save the worksheet when any old cell changes, we use the Intersect method to determine if the target cell (the cell that changed) intersects with the range we have specified to be the trigger range (A2:D8 in this case).
- The Intersect method returns one of two things: either a Range object that defines the intersection between the two given ranges, or nothing.
- So in essence, we need to throw the target cell against the Intersect method to check for a value of Nothing. At that point, we can make the decision whether to save the workbook.
In Step 1, we are simply checking to see if the target cell (the cell that has changed) is in the range specified by the Intersect method. A value of Nothing means the target cell falls outside the range specified
Step 2 forces the macro to stop and exit the procedure if there is no intersection between the target cell and the specified range.
If there is an intersection, Step 3 fires the Save method of the active workbook, overwriting the previous version.
In Step 4, we simply close out the If statement. Every time you instantiate an If…Then…Else check, you must close it out with a corresponding End If.
How to use it (Workbook Download)
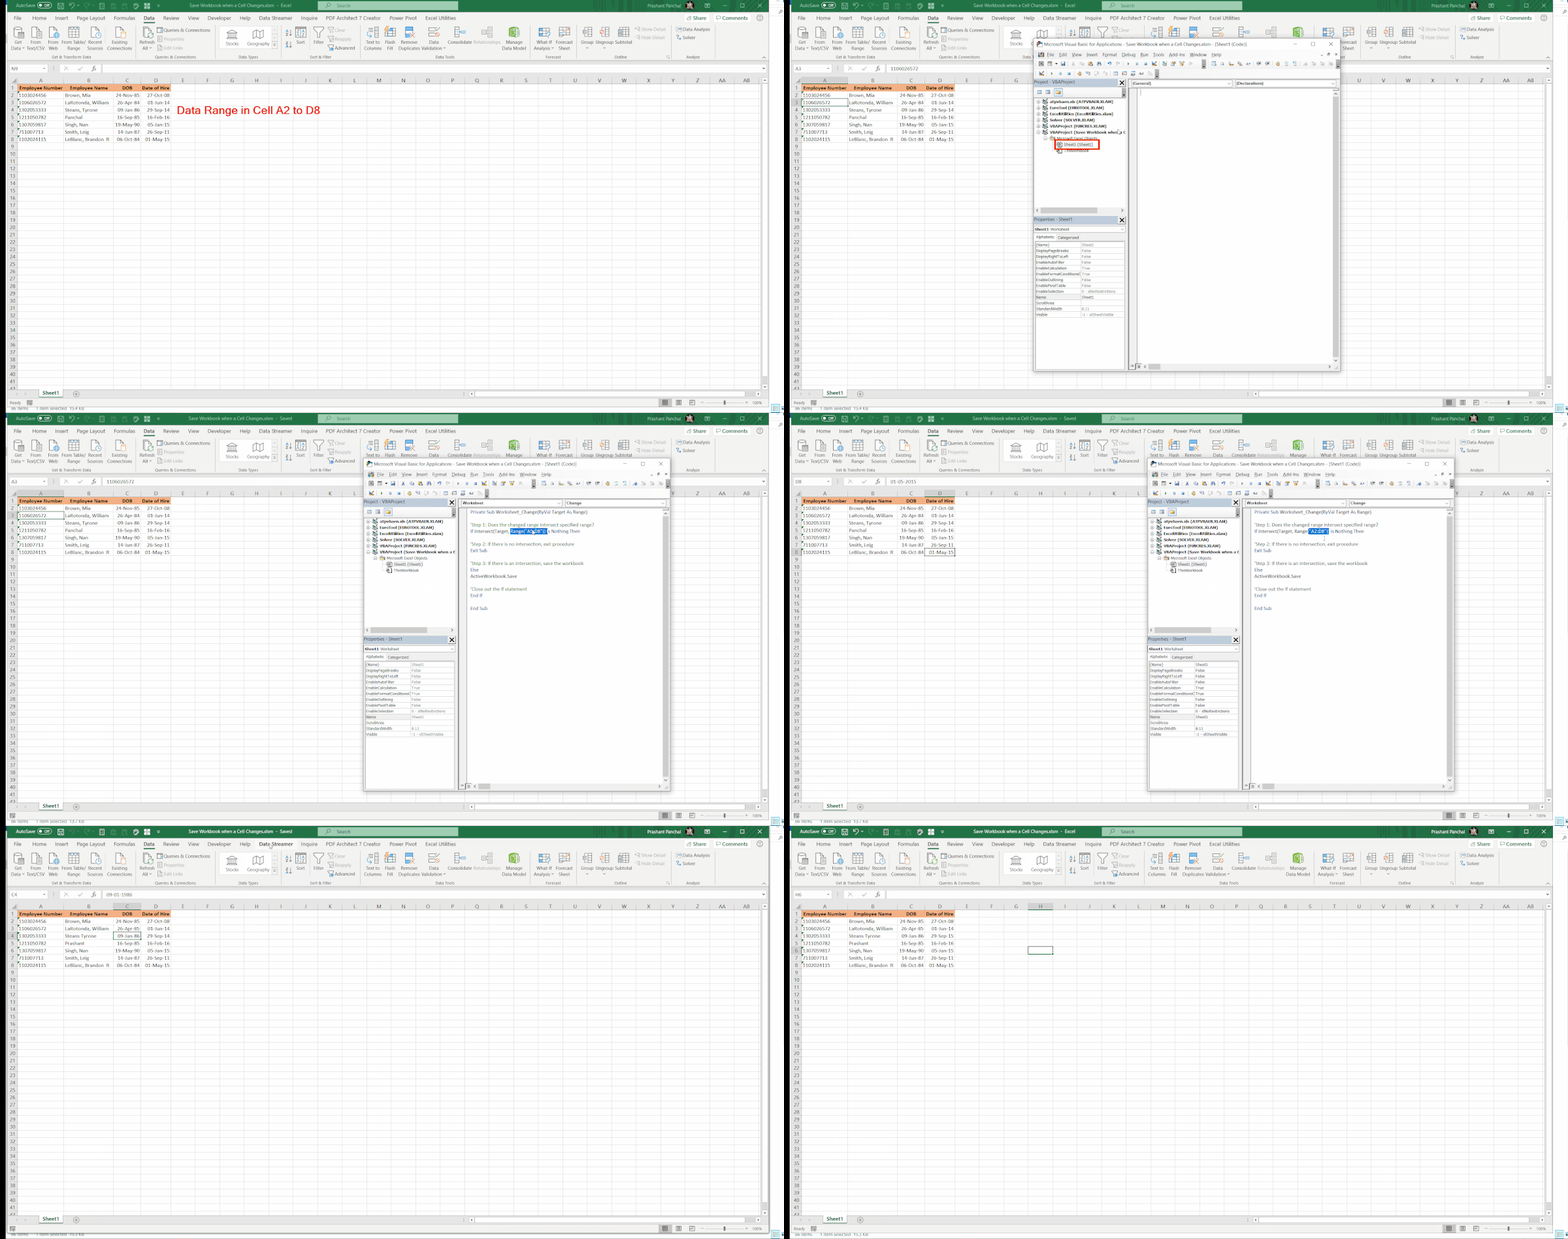
- To implement this macro, you need to copy and paste it into the Worksheet_Change event code window.
- Placing the macro here allows it to run each time you make any change to the sheet.
- Activate the Visual Basic Editor by pressing ALT+F11 or right click on sheet name and select view code
- In the Project window, find your project/workbook name and click the plus sign next to it in order to see all the sheets.
- Click in the sheet from which you want to trigger the code.
- Select the Change event from the Event drop-down list (see below GIF animation).
- Type or paste the code in the newly created module, changing the range address to suit your needs.
Also check out my blog post on how to add a new excel workbook automatically here
If you want to master Excel in Professional way, check out my FREE EBook available for download, this Ebook contains more of these ready to apply Excel VBA codes and advanced excel formulas! (Just fill the below form to get this awesome EBook for FREE)
If you have any question or query regarding above code usage, let me know in the comments below!
